Every day, I see people selling gear and bikes they intended on using for bikepacking, but never got around to it, and now it has to go. At the other end, I hear people who are interested in going on a bikepacking trip but feel they need to spend thousands of dollars on a new bike and all new gear to go with it. After the gear comes some epic adventure, people think they have to ride the whole Kokopelli trail, the Colorado Trail, or some other beastly ride best left for after you master the basics. Your first bikepacking trip doesn’t have to be straight out of a National Geographic spread. In this post, I will attempt to teach you how to plan your first overnighter, while keeping it an easy venture, with minimal costs.
Keep it Short
S24O is a term you will see used in the bikepacking and bicycle touring world. S24O stands for sub 24 overnight. A trip of this duration should require the least amount of gear and preparation. The shorter the ride, the less food and water you’ll need to carry. The perfect first experience might be a Friday night to Saturday morning. I can’t think of a better way to reset after a week of work. You don’t need to go crazy with the mileage either. Whatever your normal ride is, maybe cut that in half since you’ll be carrying extra weight. This will allow you to learn how the bike handles when loaded without feeling stressed to get somewhere. You may also need to readjust your gear to keep it secure or redistribute the weight.
Location
Where will you be heading on your first overnight? I suggest looking for a place to camp first. Where you will stay will have a huge effect on a number of supplies you’ll need to bring. Research your surroundings, look for local parks, campgrounds, or national forests. Does your city have a campground? If yes, they probably have water and picnic tables you can take advantage of. Many state parks have a trail system and campgrounds. National Forests often allow dispersed camping and may offer some amenities as well. Remember, your first trip is about learning, not completing some epic journey.
Starting from home will keep logistics simple. If you must drive to a start location, make sure you have a safe place to leave your vehicle overnight. It’s OK if the route is mostly road or gravel, you’re just getting in some practice to see if you’re really interested. Try to find a loop or an out-and-back to ride. A point to point ride will work but adds shuttling or finding someone to pick you up when you’re done. For my first overnight, I chose to ride to the national forest nearest to my house. I found a map of the forest showing where dispersed camping was allowed. After figuring out my route, it was only 12 miles from my house to where I wanted to camp. The route was mainly road, then some steep singletrack up. I had to walk most of the trail, but that didn’t deter me from going at it again. Going down the same trail in the morning was way more fun.
Weather
Choose a time of year when the evenings aren’t too chilly and there is virtually no chance of inclement weather. Warm temps at night will allow you to get away with lightest sleeping bag available. If you plan your trip when the weather is clear, you can leave all the rain gear behind. If the temps stay above 50 degrees, you might be able to get away with just a bivy sack and no sleeping bag at all. This will save a ton of space as well as money. Layer your clothing so that each layer can be added or removed to suit the change in temperatures while you’re riding and in the middle of the night when it is coolest. Going when it’s too cold probably means extra clothing, a tent, and a bigger heavier sleeping bag, all of which require a bigger investment.
Less is More
Everyone has a certain level of comfort they’d like to maintain while camping. When car camping, it is easy to pack in all the luxuries of home, but on a bike, you can only carry so much. With a little bit of planning, you can make due with a pretty slim kit. We can break down our needs very simply into food, shelter, and water. Since we are bikepacking, we’ll have to add the bike in there as well.
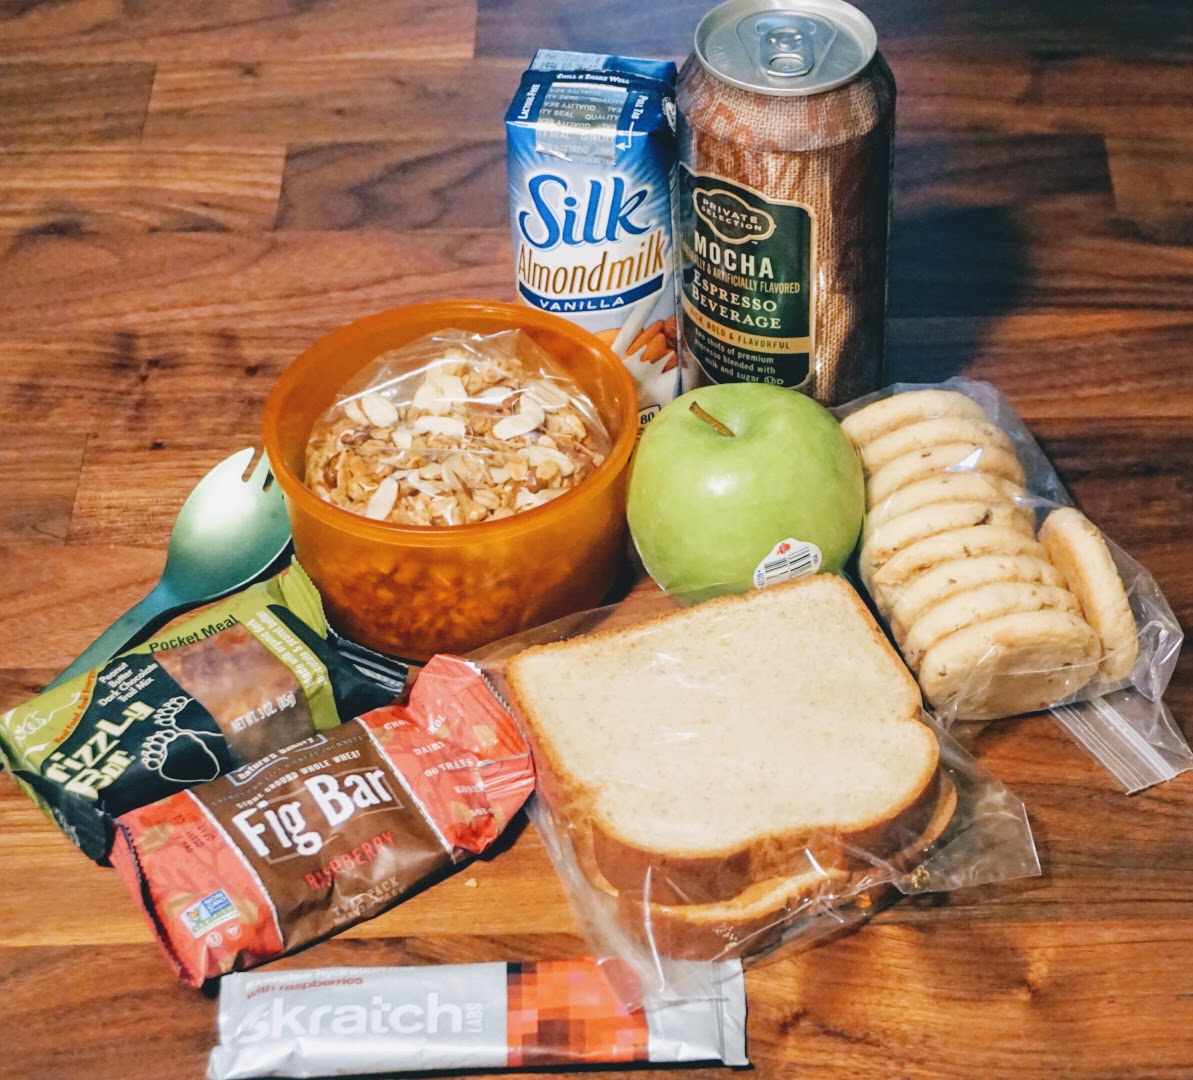
If your first excursion is extra short, you may be able to eat dinner before you even leave, in this case, all you would need to bring with you is a snack for before bed and a breakfast to get you going in the morning. You could also pack up a few sandwiches to eat along the way. Bringing food that doesn’t require any cooking means there is no need for a stove. If you must have coffee in the morning, maybe opt for a can of coffee you can carry with. For breakfast, you can bring a couple energy bars, my favorite as of late is to carry some granola and almond milk. Calorie dense foods are everywhere in convenience stores you might find on route, just be conscious of how many calories you’re going to be burning while riding. Try to carry around 3-400 calories per hour of cycling.
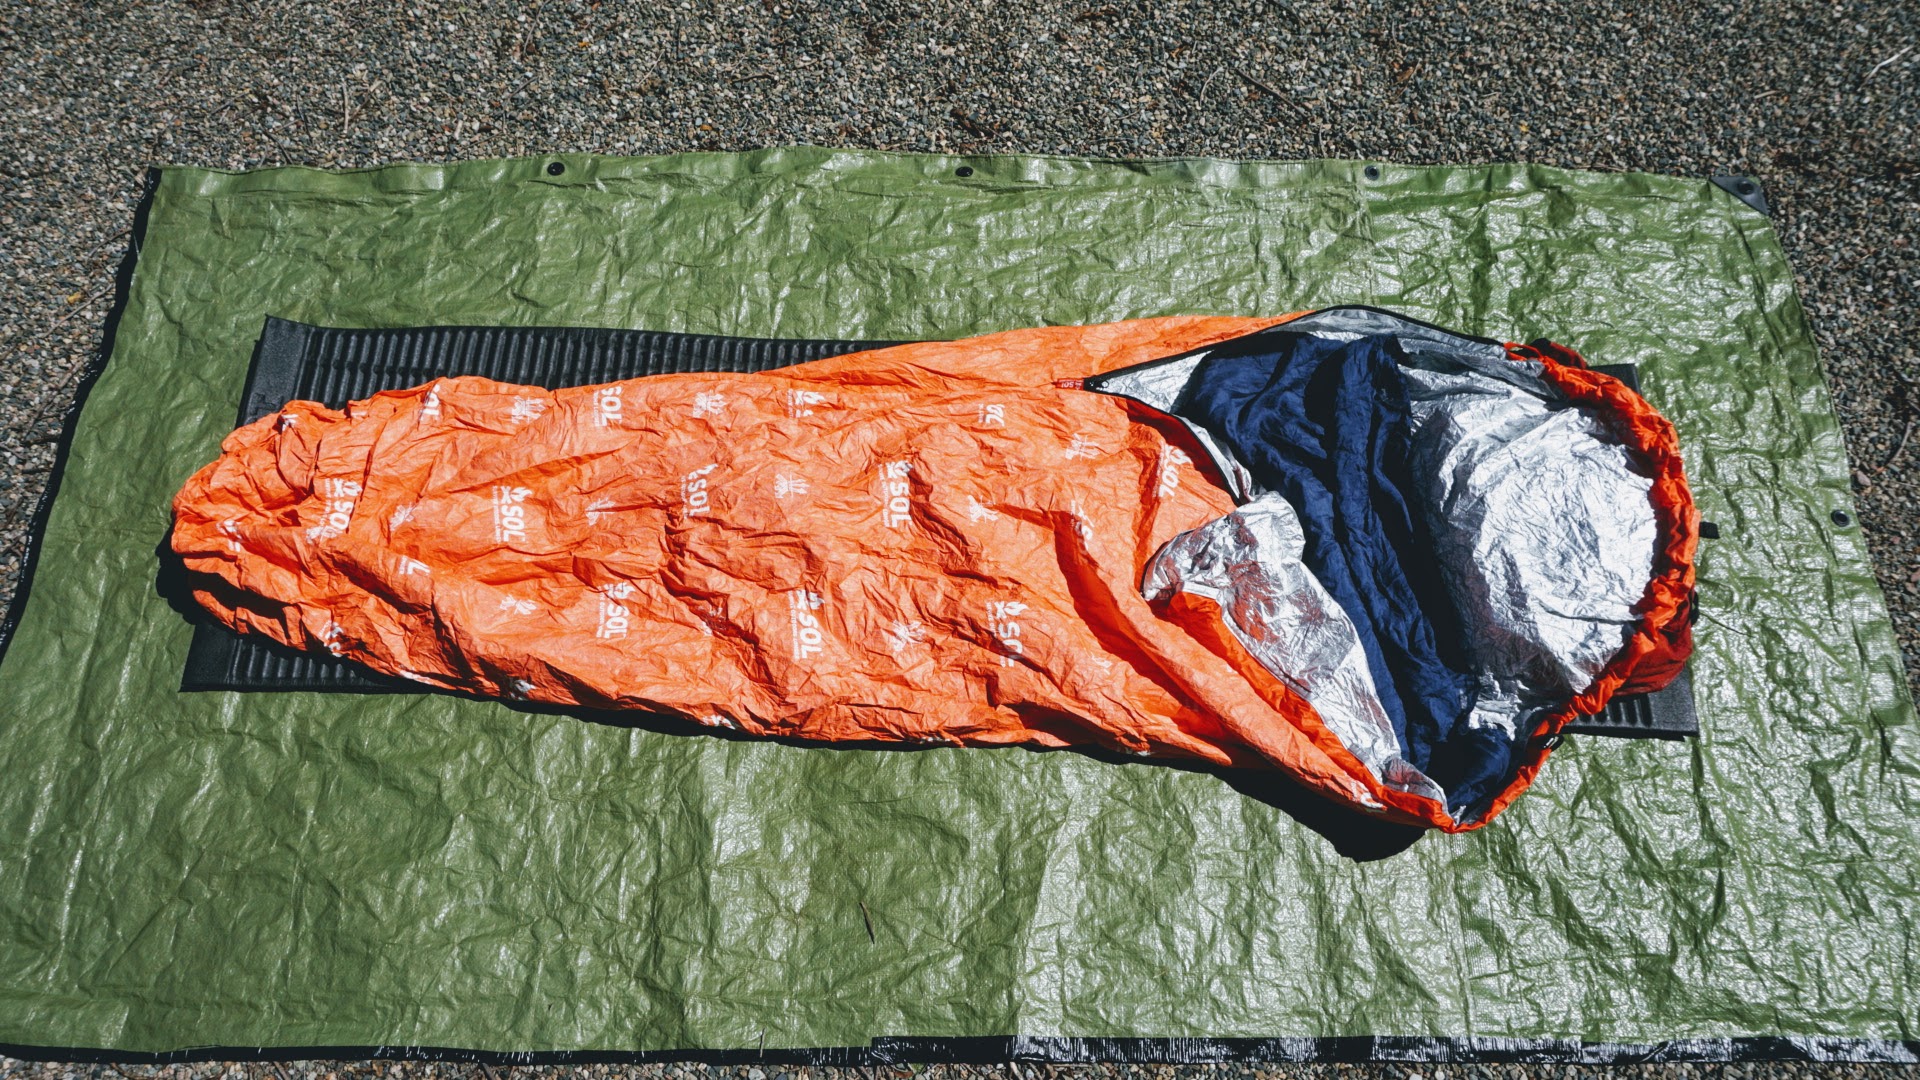
As I suggested earlier, the weather is going to have a huge effect on the amount of clothing and shelter you’ll need to bring. If the weather looks great, and I am not concerned with insects, my bivy sack and sleeping pad are all I really need. I choose to bring a ground cloth to protect them, and I like to use a silk sleeping bag liner to keep me from sticking to the bivy. Closed cell foam sleeping pads are light and cheap, inflatable pads are a little more expensive but can be more compact. Again, the layers of clothing you wear are also what can keep you warm through the night.
Carrying enough water, or having a place to get it always important when planning an adventure of any length. If you can source potable water near your campsite, this is of little concern, but if you’re camping in the desert, you might have to carry many liters to be safe. Before leaving the house, be sure to verify your water sources, and plan to carry a bit extra, just in case you run into any issues.
That covers your personal necessities, but there’s still a bike you have to worry about. Long trips will require you to bring some spare parts, but a short trip shouldn’t require much more than you carry on your normal weekend trail ride. As long as you know you’re bike is in good working order, you might only need some extra zip-ties and straps to accommodate any gear failure.
The Perfect Weather Pack List
This is an example of my bare minimum kit when I know I’ll have a night in the 50s and I’m only having a brief sleepover with the pine trees.
Food:
- Sandwich and Side
- Granola and Almond Milk
- Energy Bars
- Cookies
- Canned Coffee
Shelter:
- SOL Escape Bivy
- Sleeping Pad
- Silk Sheet
- Ground Cloth
- Backpack as Pillow
Clothing:
- Comfortable Cycling Clothing
- Underwear (to change out of cycling shorts)
- Flannel Shirt or Light Jacket
Tools:
- Multi Tool (Chain Breaker, Allens, etc. I tend to bring only the tools my bike actually requires.)
- Tire/Tube Repair Kit
- Pump
- Zip Ties
- Duct Tape
Other:
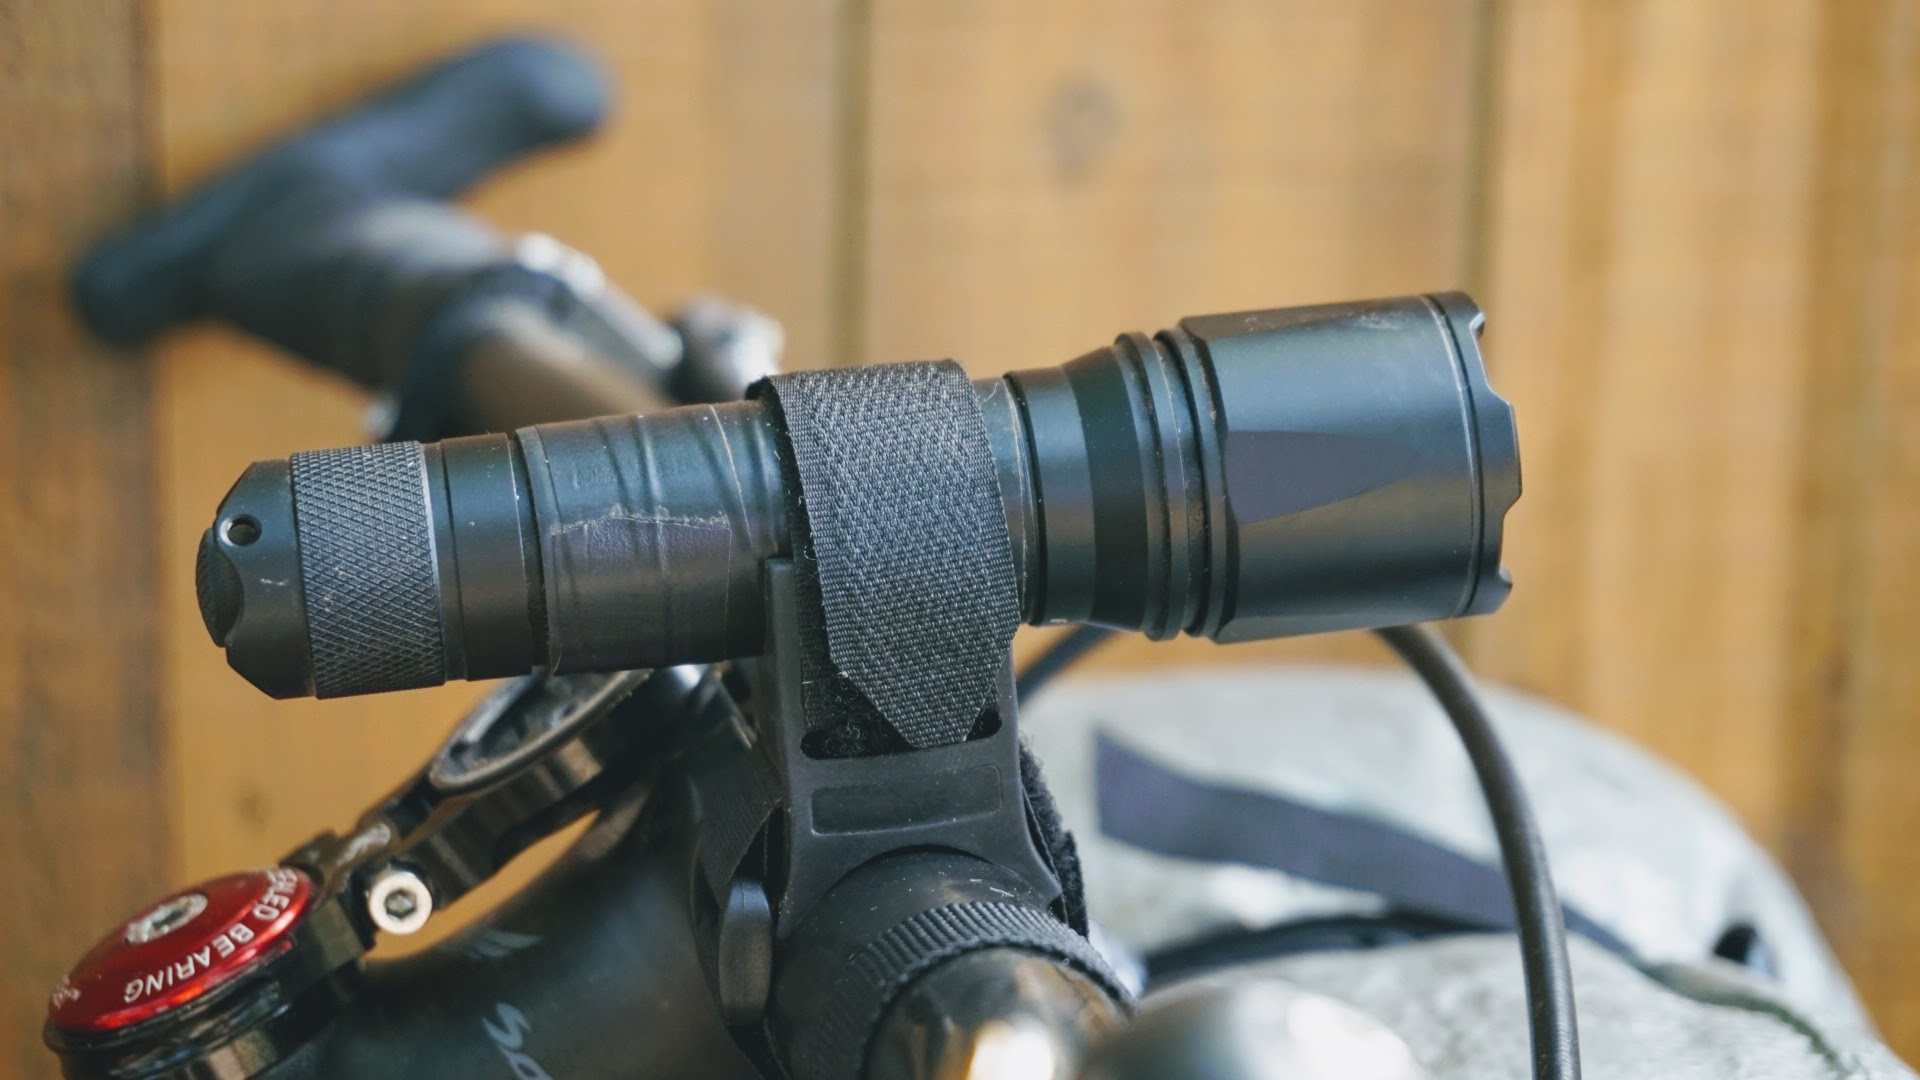
- Flashlight or Headlamp
- Bowl
- Spoon
- Toiletries and Wipes
- Bag for Garbage
- 3L Hydration Pack
- 2-3 Water Bottles
How to Pack
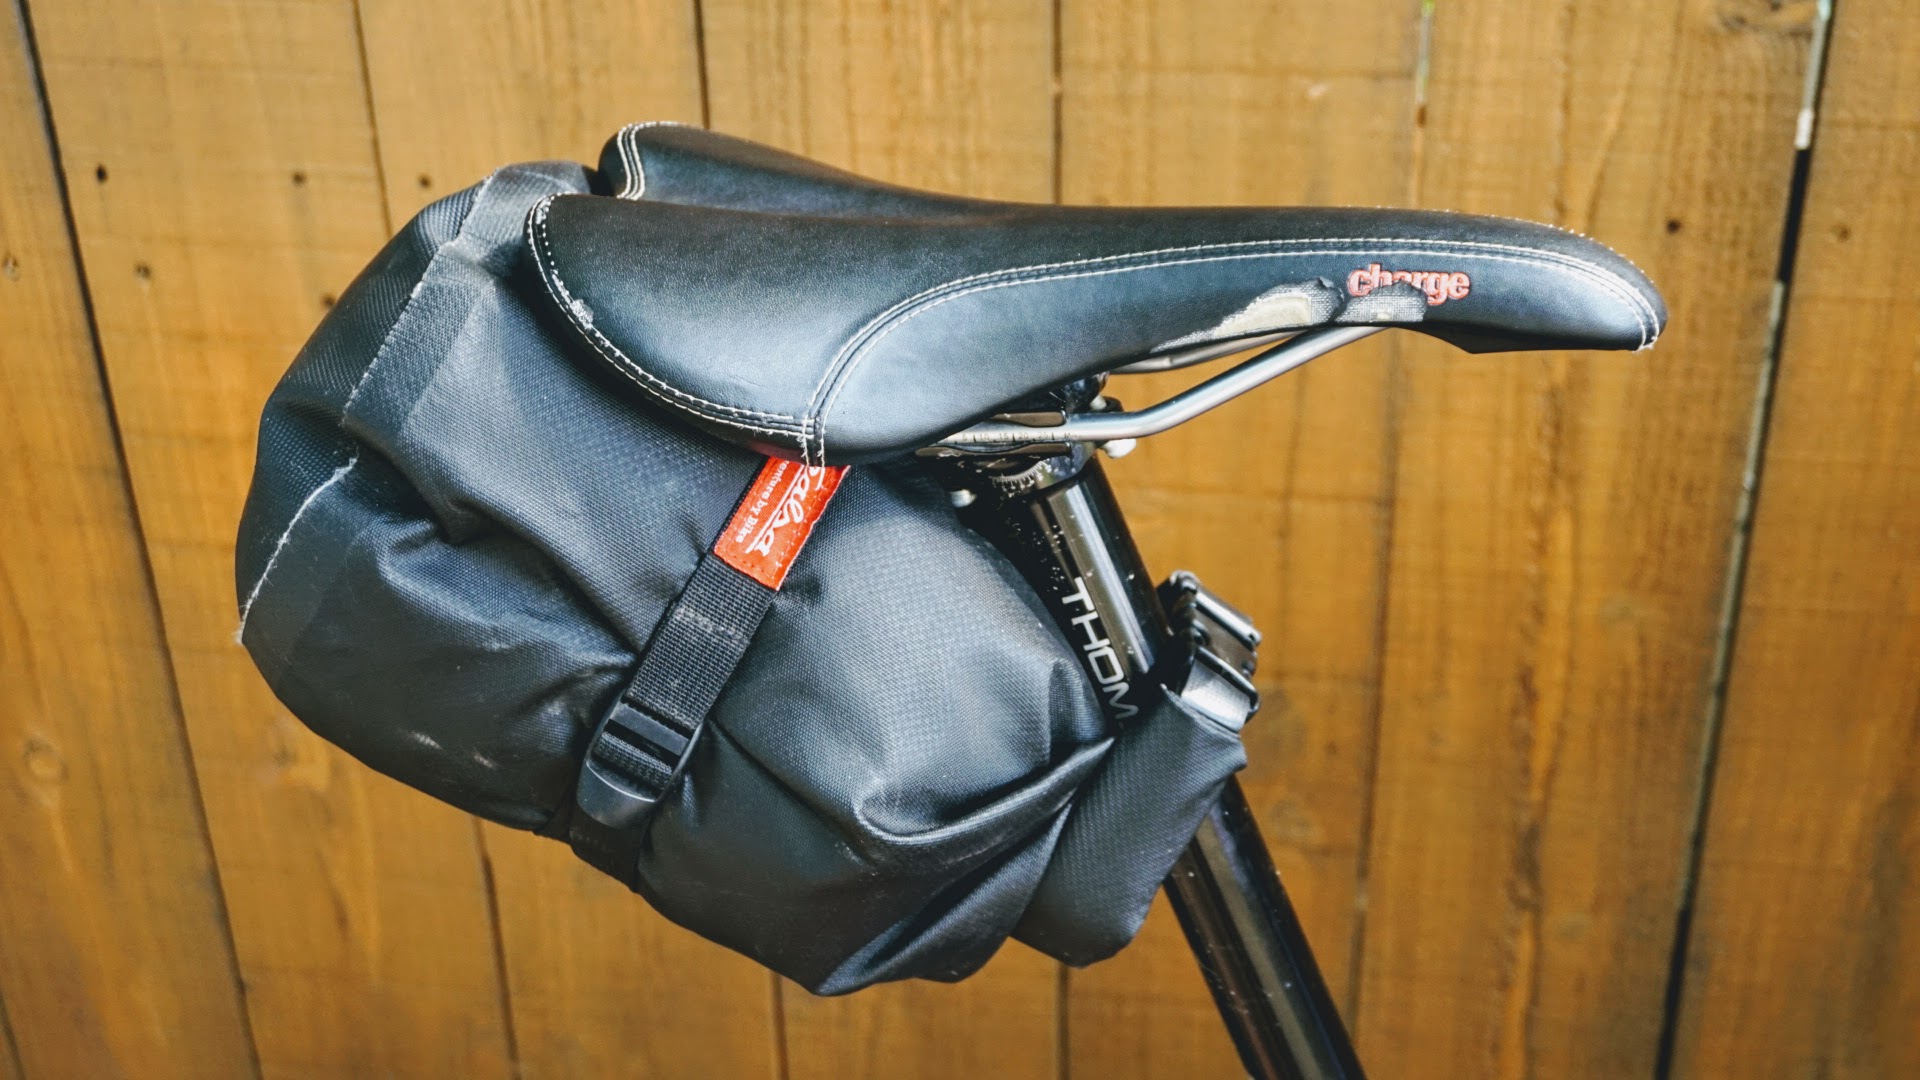
Carrying your gear might be the most difficult part to sort out. Depending on how much stuff you have to carry, you’ll either have to get creative or purchase something to hold some gear. Most cyclists have at least a hydration pack to help carry some gear, but most bikepackers utilize the handlebars and the seat post to carry gear. Weight distribution is important to keep the bike balanced front to rear. I’ve seen riders pack everything in a seat bag, then ride wheelies up the climbs, and I’ve seen heavy handle bar setups that make it difficult to steer and pick up the front end over obstacles. You might be able to use some dry bags and Velcro straps to secure your gear, if you have a friend with gear, they might be willing to let you borrow a piece, or if all else fails, try to buy something that you’ll use even if not bikepacking. I think a saddle bag is a great thing to have around. They come in handy in the winter when you might need to store a jacket or other clothing that won’t fit in your hydration pack. Top tube and stem bags are also great for storing snacks when on normal rides.
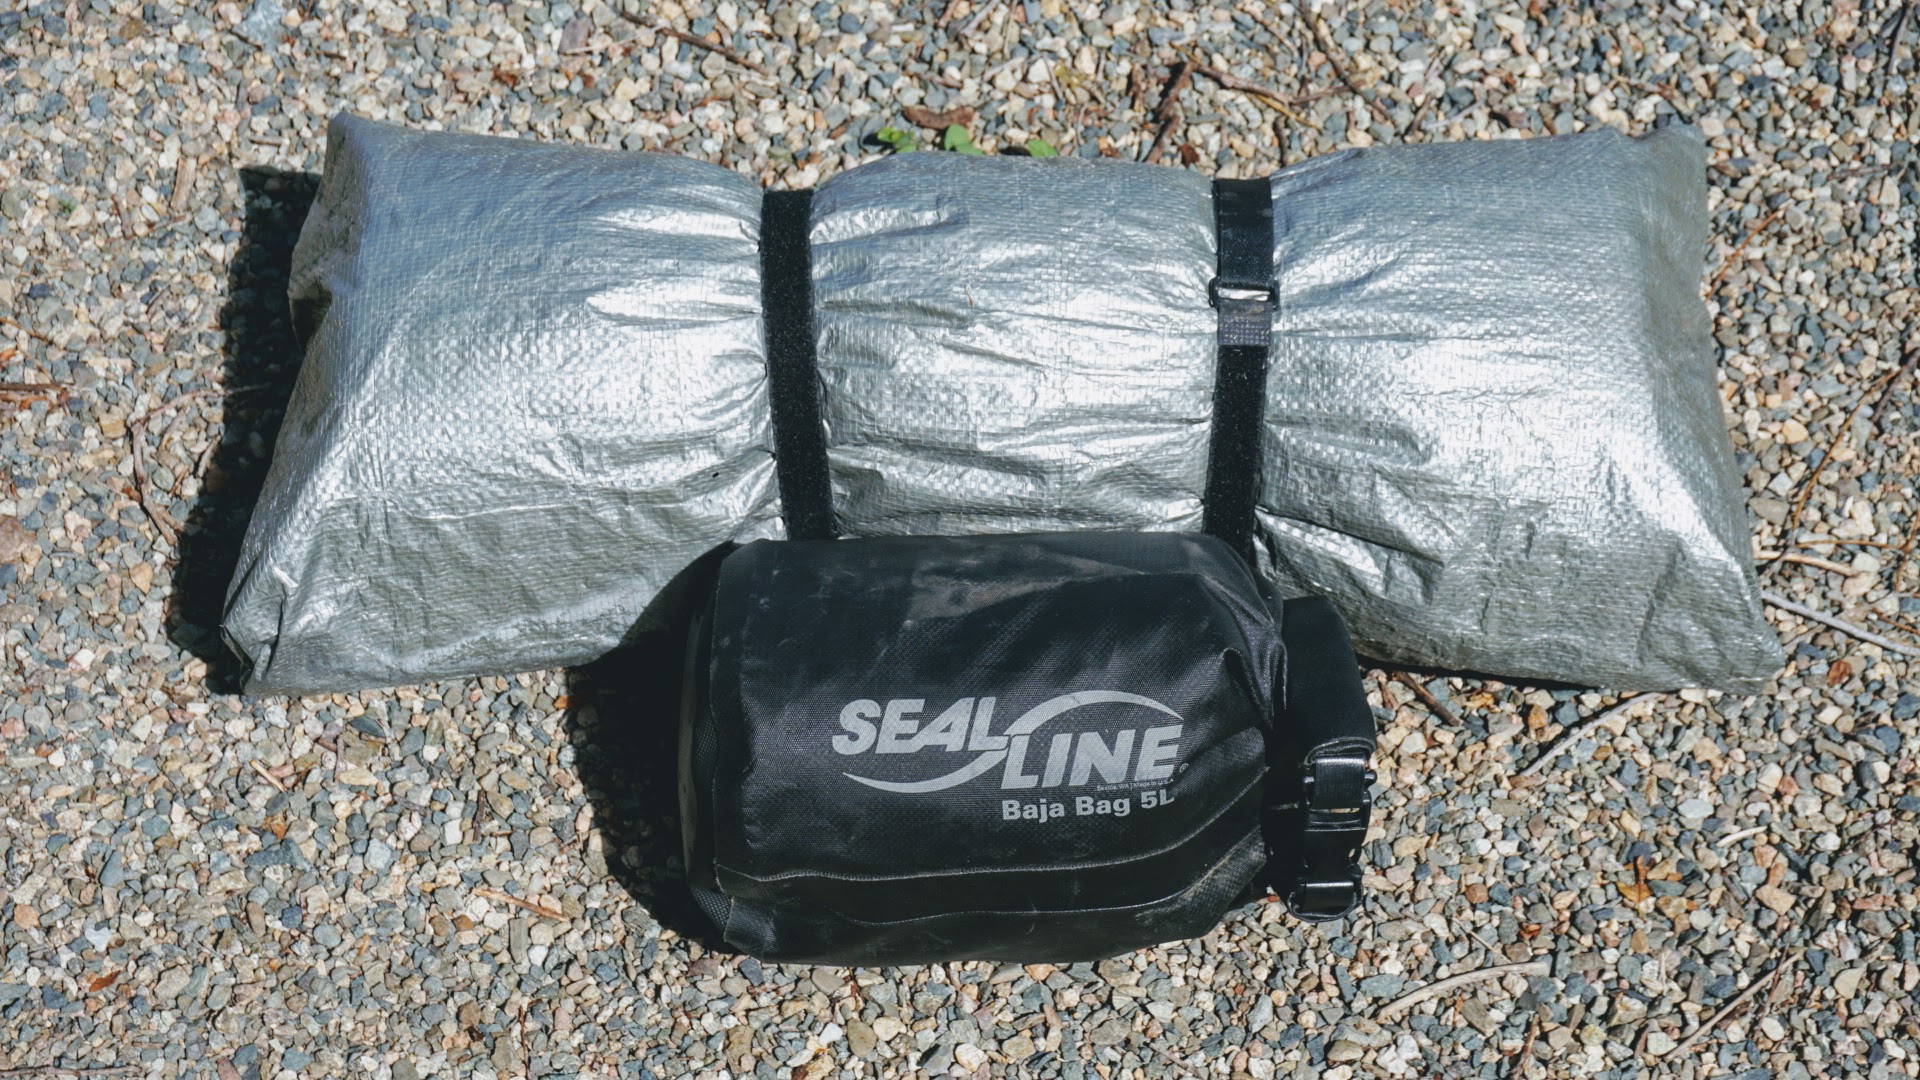
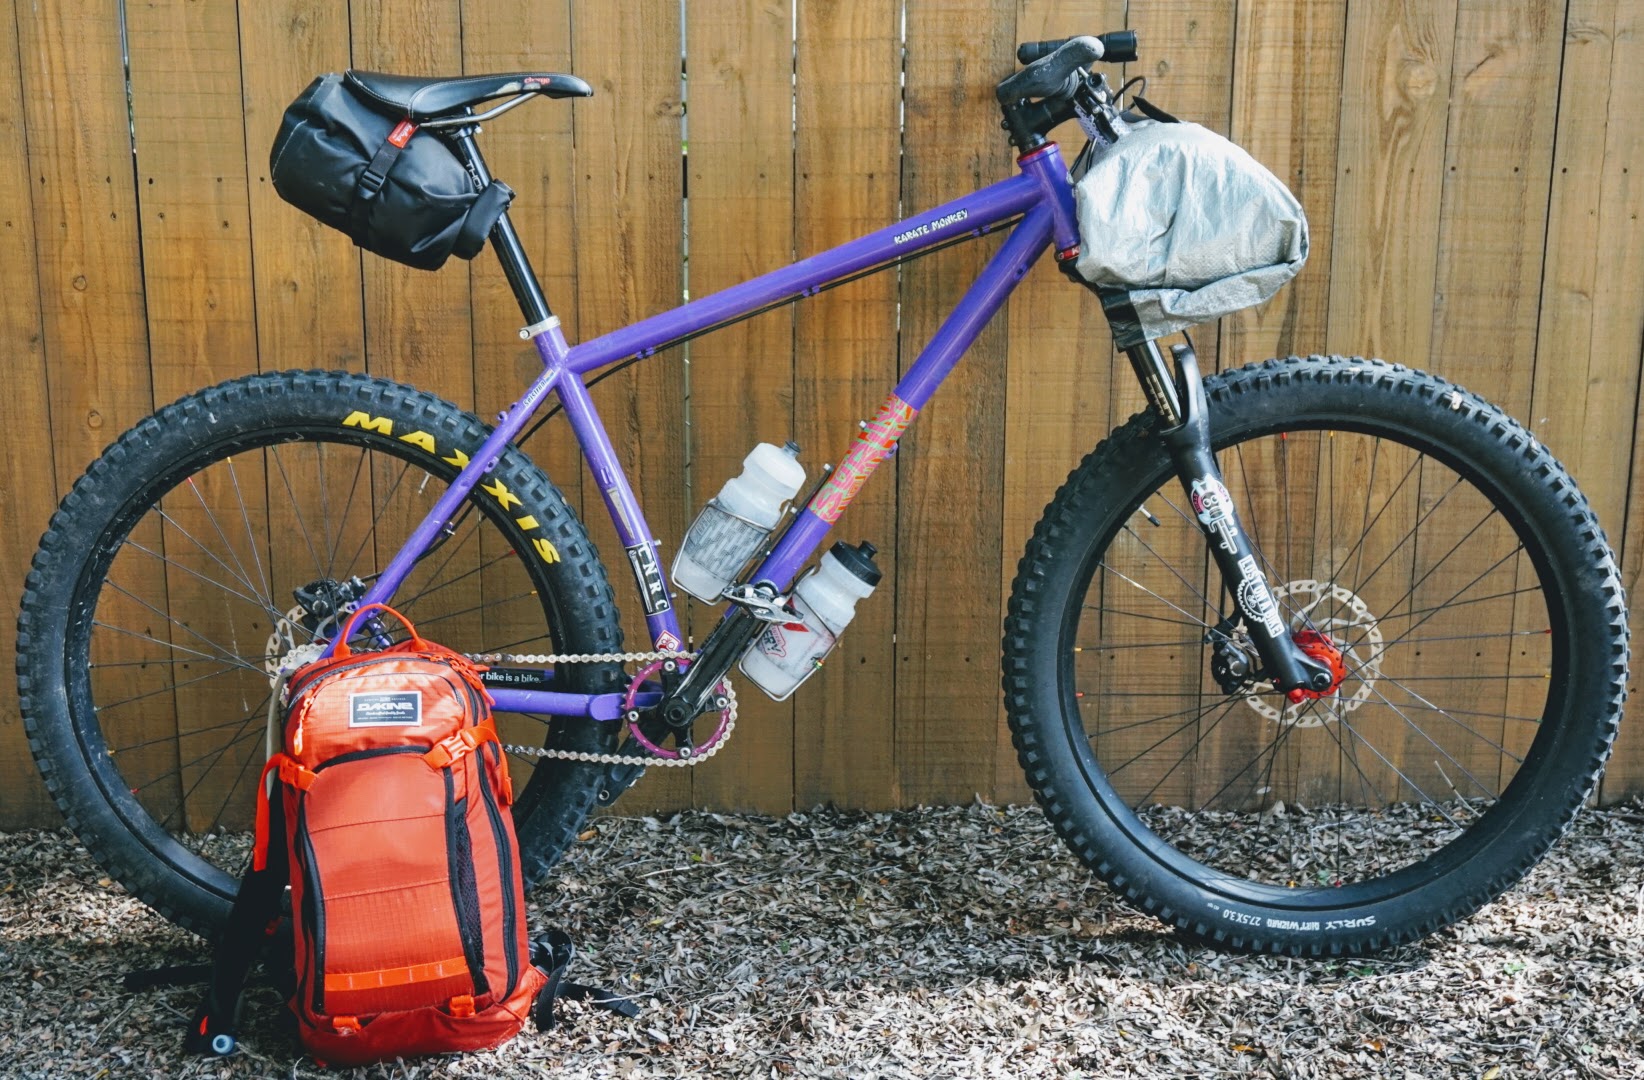
Below, I have the sleeping pad wrapped in the ground tarp. My flannel shirt, extra underwear, and a tube are in the 5L Dry bag.
I used some 3″ pieces of hose and some Salsa Anything Straps to secure the sleeping pad to my handlebars. Limberlost has created a DIY handlebar harness template, you can download it here. I am using an even more makeshift version
since all I have strapped to it is the sleeping pad. When securing anything to the handlebars, be sure you aren’t putting stress on the brake levers or hoses. Be sure the bars can turn and the suspension can compress with out any strain on the hoses or rubbing on the tire.

I clipped the drybag to my seatpost, and cinched another Anything Strap around the dry bag. This is good enough for smooth ground, but you may need to check the strap if things get really bumpy. As a general rule of thumb, when just getting started, check your gear frequently, until you know it’s all solid. Using gear designed for bikepacking, you’ll have less to worry about, but we’re trying to save money here since it’s your first trip.
My flashlight doubles as a headlight.
Everything else packed into my hydration pack.
Once you go on your first S24O adventure, you’ll either be hooked or happy you didn’t break the bank on a bunch of exotic gear. If you catch the bug and are quickly itching for more, slowly start replacing your gear with the items you’ve learned you need most. Practice will teach you what things are most important to the way you like to ride. I think the seat bag was the first thing I purchased, followed by a handlebar harness, then the custom frame bag. A light weight tent will better protect you from the elements, and a good down quilt will keep you warm in the spring and fall. I hope this post has been helpful and has convinced you that you don’t have to spend a fortune just to give bikepacking a try.
Have some questions or comments? Feel free to leave some.